Vector Scene Tree View
The Vector Scene Tree View is composed of 2 parts: a part with all the elements created in the Layer at the top, and a part with the settings of the selected element.
Note
The content of the Vector Scene Tree View will change entirely if you work with the Inbetweener mode.
Tree
Hierarchy
In this area, you will see the tree of all the objects (paths, shapes) and groups created in the Vector Layer as a scene.
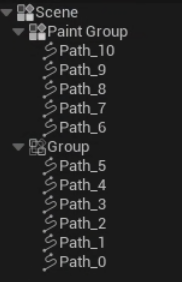
The organisation of the tree is quite similar to a layer stack: the elements in the foreground are at the top, the elements in the background are at the bottom.
Contextual Menu
Make a right click on one or several elements to display this panel:
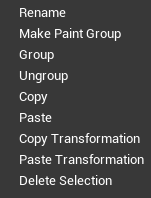
Rename: rename 1 selected element.
Make Paint Group: make a group of objects to be painted with the Paint Bucket.
Group: make a group of objects, not to be painted.
Ungroup: ungroup the objects from the Group or Paint Group (Paint Bucket won’t apply any more to the objects).
Copy: copy selected elements.
Paste: paste selected elements (from a Layer to another, or from a Cell to another).
Copy Transformation: copy transformations values from 1 selected element (translation, rotation, position).
Paste Transformation: paste transformation values to 1 selected element.
Delete Selection: delete selected objects and groups.
Note
You will also see additional actions mentioning “tags”. These will be covered in the lesson about Inbetweener mode.
Selection details
Under the tree, you can find the details of the selection, either as:
Objects (paths, shapes)
Paint Groups
or Groups
Objects
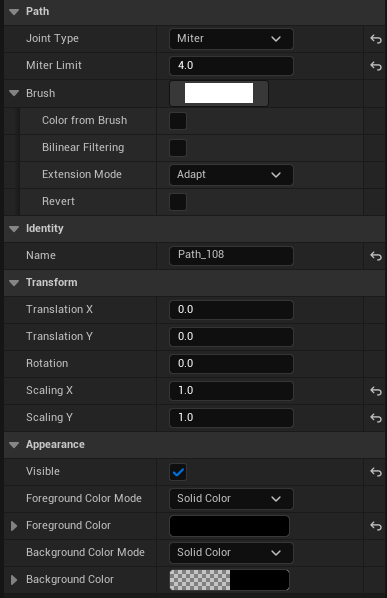
Path
Joint Type: choose the type of joint for sharp vertices.
Example |
Joint Type |
|---|---|

|
None |

|
Radial |

|
Linear |

|
Mitter |
Mitter Limit:
Mitter is the default Joint Type. The lower value, the smaller tip.
Example |
Limit value |
|---|---|

|
1 |

|
100 |
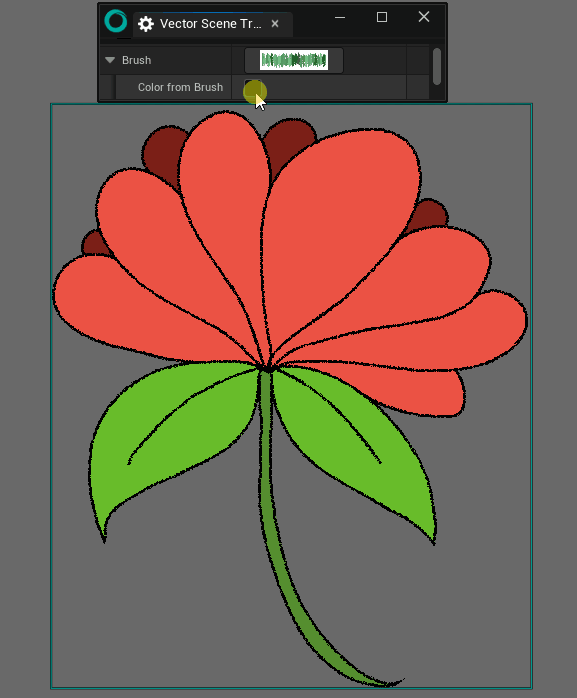
Brush:
Click on the rectanlge to select a brush among the array, then close then the panel to see the result:

Use the mode “None” to get back to the original “penbrush” look.
If you click on the triangle, you will be displayed more options:
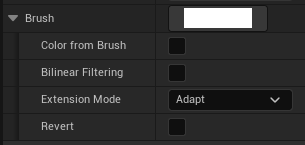
Color from Brush: use the original color from the Texture 2D.
Bilinear Filtering: applies bilinear resampling method for a smoother result.
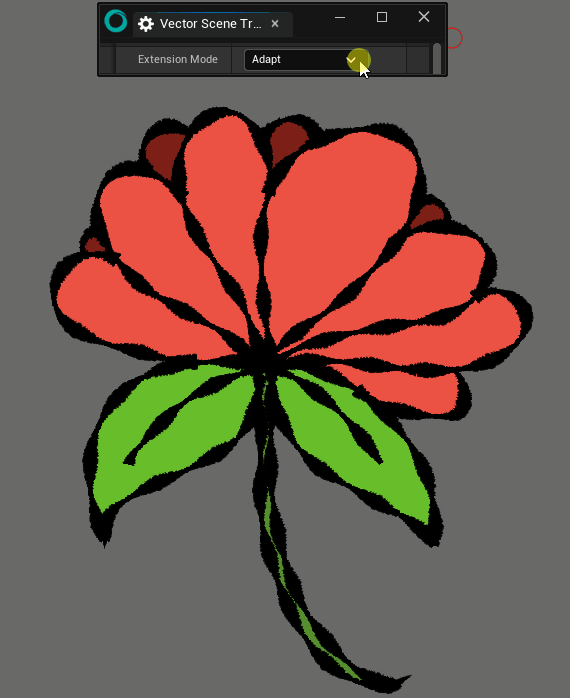
Extension mode: offers 3 different modes to choose the spacing of the brush applied on your stroke. “Path”” calculates the spacing based on the whole path (this is why the result changes while drawing) ; “Segment” calculates and applies a different spacing for each segment of the path ; “Adapt” applies regular adaptative spacing.
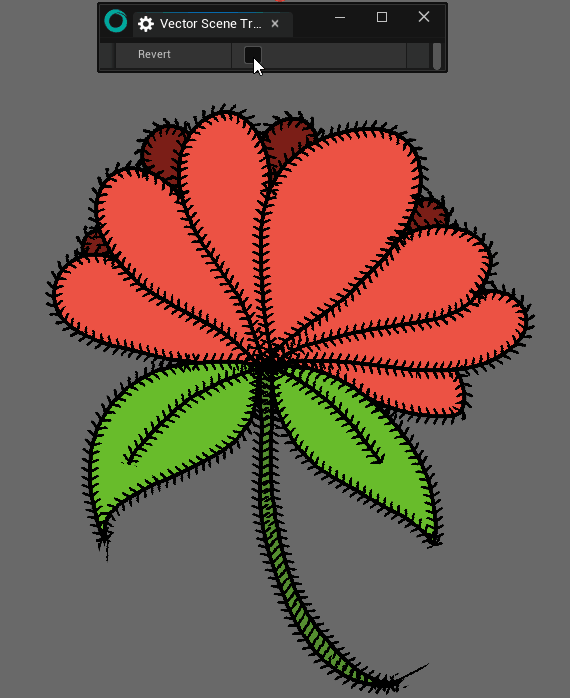
Revert: revert the orientation of the Texture 2D.
Note
At the moment, you cannot add your own brush / Texture 2D. This shall change in the near future.
Identity
Give a name to the object.
Transform
Use Translation X / Y, Scaling X / Y and Rotation to modify the position, size and rotation of the object. Using the Transform tool will affect the values here.
Appearance
Visible: hide the outline of the object. If a paint bucket was applied, the filling will remain visible.

Tip
You can hide and show a path by clicking on an eye-shaped icon when hovering the Vector Scene Tree View.
Foreground Color Mode: choose here between solid color or a color from the Palette.
Mode selected |
Interface |
Instructions |
|---|---|---|
Solid Color |
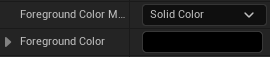
|
Click on the rectangle to modify the color. |
Palette |
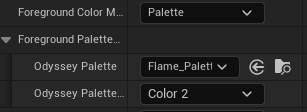
|
Choose the Palette to use in the dropdown menu, then choose what color from that Palette shall be used. |
Background Color: not used.
Paint Groups
A Paint Group is a group of objects (paths and shapes) to be painted with the Paint Bucket. By default, a Vector Layer always contains a Paint Group named “Scene”.
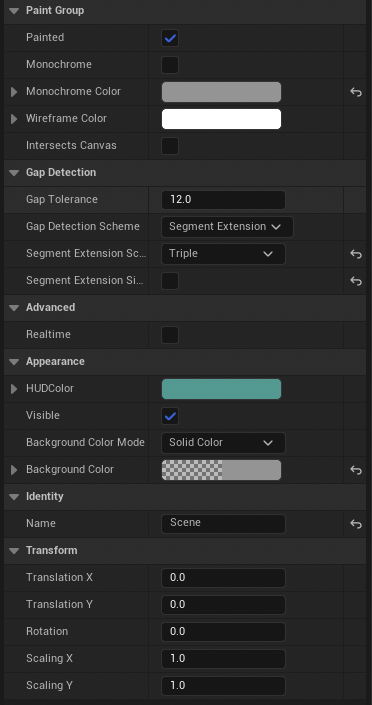
Paint Group Options
Painted: apply Paint Buckets when enabled.
Monochrome: when enabled, the boolean hides colors from the Paint Buckets and shows all outlines (unless the option Visible is off).
Monochrome Color: change the color of the monochrome filter.
Wireframe Color: change the color of the Wireframe Mode (to be activated directly on the Vector Layer).
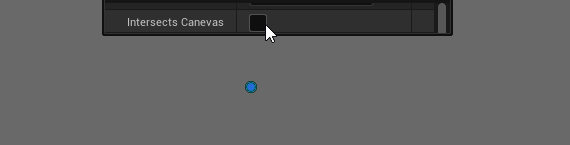
Intersects Canvas: takes in consideration the border of the canvas as if it was a path to apply a Paint Bucket.
Gap Detections
Gap Tolerance: increase or decrease the tolerance of a gap betwheen 2 paths.
Gap Detection Scheme: Segment Extension extends the cycle of the paths to fill in the zone. If the Gap Tolerance value gets too high, it may fill areas within invisible lines. Closest Neighbors relies on actual paths, so if the line is not closed properly, you will need to increase the Gap Detection value.
Segment Extension Scheme: extend the cycle of the path with a single line or with triple lines.
Segment Extension Simplified: when enabled, this option reduces the number of cycles (but can makes the detection harder).
Here are various example of the possible results:
Advanced
Realtime: enable this feature to see in realtime all changes brought to the Paint Group
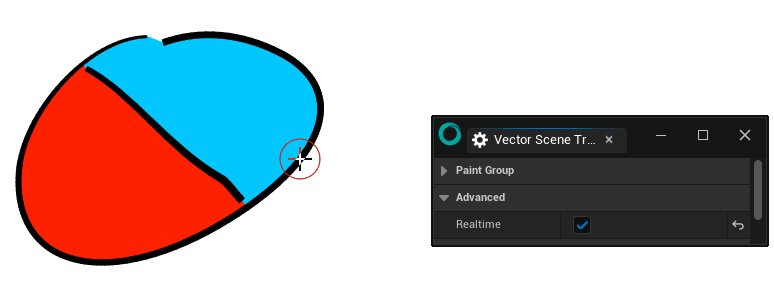
Warning
This feature needs more ressources from your computer!
Appearance
HUD Color: pick up a color to tell apart the various objects from your scene.
Visible: hide the whole Paint Group.
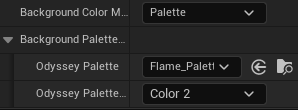
Background Color: change the color of the background of the whole Scene. Will only work with the main Scene, not with other Paint Groups. The color can come from the Color Modifiers panels or from a Palette.
Mode selected |
Interface |
Instructions |
|---|---|---|
Solid Color |

|
Click on the rectangle to modify the color. |
Palette |
|
Choose the Palette to use in the dropdown menu, then choose what color from that Palette shall be used. |
Identity
Change the name of the Paint Group
Transform
Use Translation X / Y, Scaling X / Y and Rotation to modify the position, size and rotation of the object. Using the Transform tool will affect the values here.
Groups
Groups can be used to group objects like paths and shapes (but cannot be colorised with the Paint Bucket).
Appearance
HUD Color: pick up a color to tell apart the various objects from your scene.
Visible: hide the whole Group.
Identity
Name of the Group.
Transform
Use Translation X / Y, Scaling X / Y and Rotation to modify the position, size and rotation of the object. Using the Transform tool will affect the values here.